The No-Bake Biscoff Cheesecake is more than a dessert; it’s a tribute to the irresistible charm of Biscoff cookies. Creamy, velvety, and spiced to perfection, this cheesecake is a showstopper for any occasion. So, get ready to indulge in the cookie butter delight that’s so easy to create, yet so rich in flavor. Slice, savor, and share the joy of No-Bake Biscoff Cheesecake!
This luscious and creamy biscoff no bake cheesecake is extremely delicious and very simple to make! No need to worry about turning on your oven, or poking toothpicks into it to check if it’s completely baked yet. This delicious biscoff no bake cheesecake is light and creamy, yet has the perfect amount of sweetness to it! This dessert is perfect year-round, but it’s mostly perfect for the summer time, since it’s a chilled dessert! This would be perfect for any gathering or BBQ you might be hosting or attending, heads will for surely turn after they take a bite out of this creamy biscoff dessert!
You and your family will enjoy this recipe, and you can even turn it into a family activity with your partner and/or the kids! One can crush the biscoff biscuits, while you whip up the cheesecake filling, and someone can do the decorating on top! This sounds like an ideal family night and something that I’m going to put on my list of activities for my family! The only thing you might not enjoy about this recipe is the chill time, unfortunately it’s highly recommended to chill in the fridge overnight, but no need to worry because if you are in a serious rush, you can stick it in the freezer for 2-3 hours and it should come out just as good!
It’s truly best if you plan ahead for this recipe so you can enjoy it exactly when you need it!
What You’ll Need for the Cheesecake Filling:
Cream cheese
Biscoff butter
Heavy cream
Powdered sugar
Vanilla extract
Cookie Base Ingredients:
Biscoff biscuits
Butter
Biscoff Biscuit Base
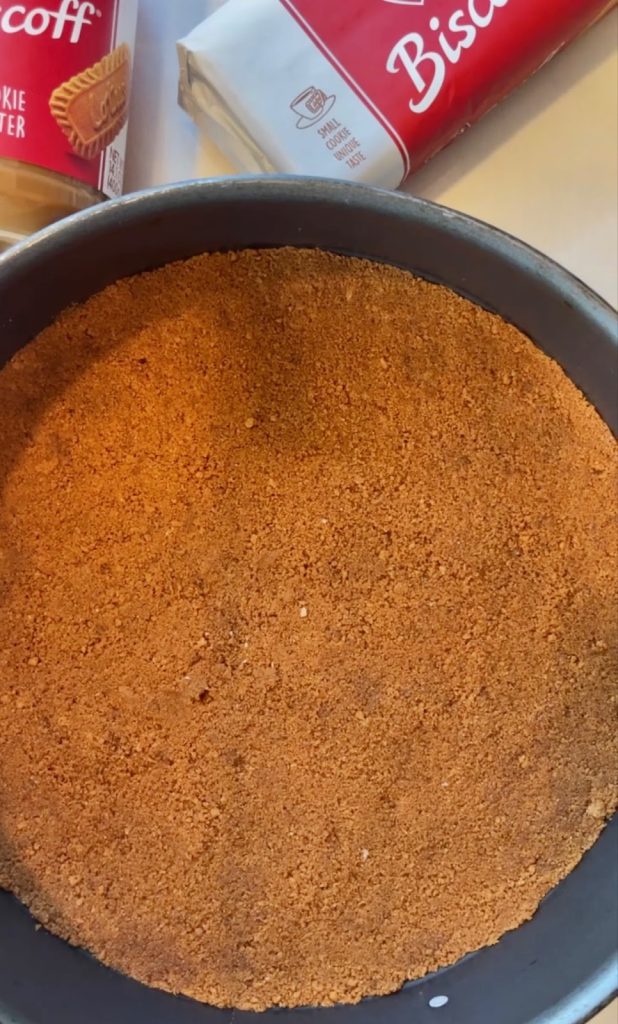
Start by crushing the Biscoff biscuits either using a food processor or a ziplock bag. Remember to set aside 2 uncrushed biscuits for that final decorative touch. In a 9-inch springform pan, combine the crushed biscuits and the melted butter. Mix until the mixture is well combined. Using the back of a cup will help you firmly press the biscuit mixture into the pan’s base. Pop the pan into the freezer while you prepare the cheesecake filling.
Cheesecake Masterpiece
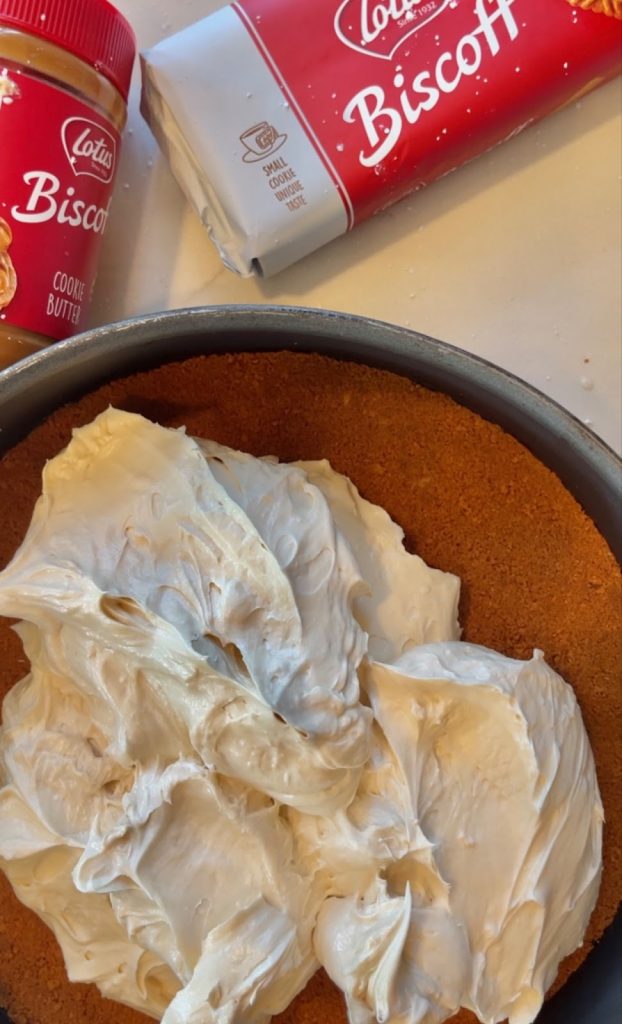
In a bowl, whip together the cream cheese and Biscoff cookie butter until the mixture is gloriously smooth. In a separate bowl, it’s time to whip up the heavy cream, powdered sugar, and vanilla extract. Keep whipping until stiff peaks form. Set aside about 1/2 cup of the whipped cream; it’s reserved for decorating your dessert. Gently fold the whipped cream into the cream cheese mixture, doing this little by little until they’re perfectly combined.
Assembling
Retrieve the biscuit base from the freezer and gently spread the cheesecake mixture on top. Use the back of a spoon to smooth it out, creating a sleek surface.
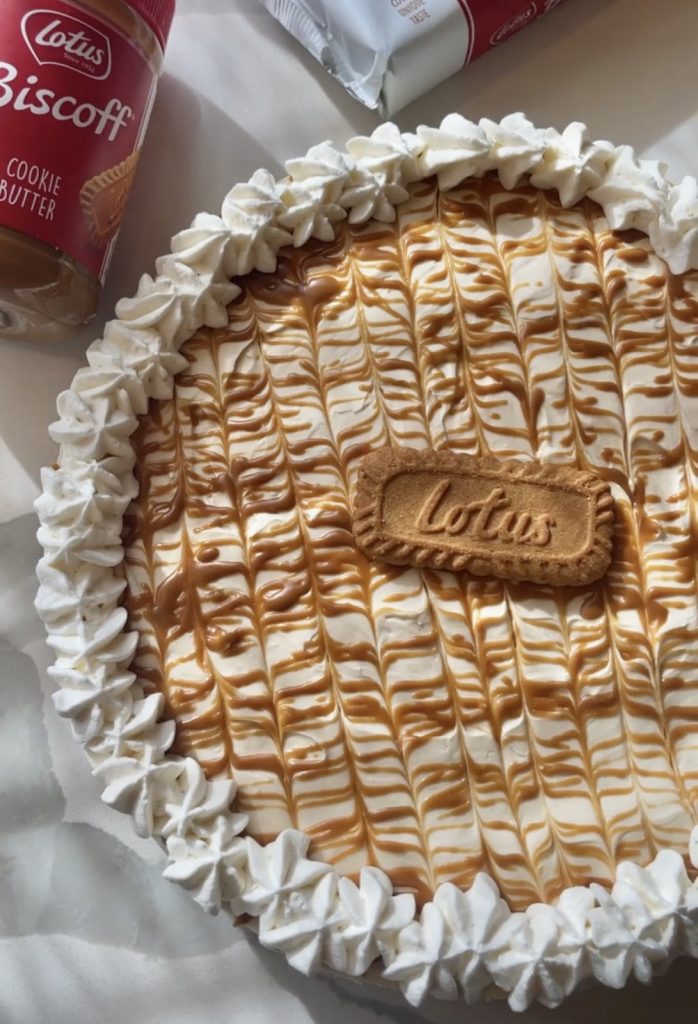
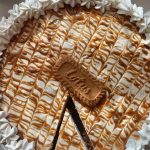
Now, it’s time to add some eye-catching decorations. Drizzle melted Biscoff butter on the cheesecake’s surface. You can do this by placing the melted Biscoff butter in a ziplock bag, snipping off a corner, and artfully drizzling it in straight lines across one side. Take a toothpick to create beautiful streaks. Run the toothpick the opposite way of the Biscoff butter drizzle, going up and down with each stroke. To give your cheesecake that professional bakery touch, pipe the reserved whipped cream along the edge of the cheesecake. A star tip works perfectly for creating an elegant border. Don’t forget to place a whole Biscoff biscuit in the center – it makes for a gorgeous centerpiece.
Patience
Your masterpiece is almost ready. Now, be patient and refrigerate your No-Bake Biscoff Cheesecake overnight. This allows the flavors to meld and intensify, ensuring the most heavenly bites.
Slice and Enjoy
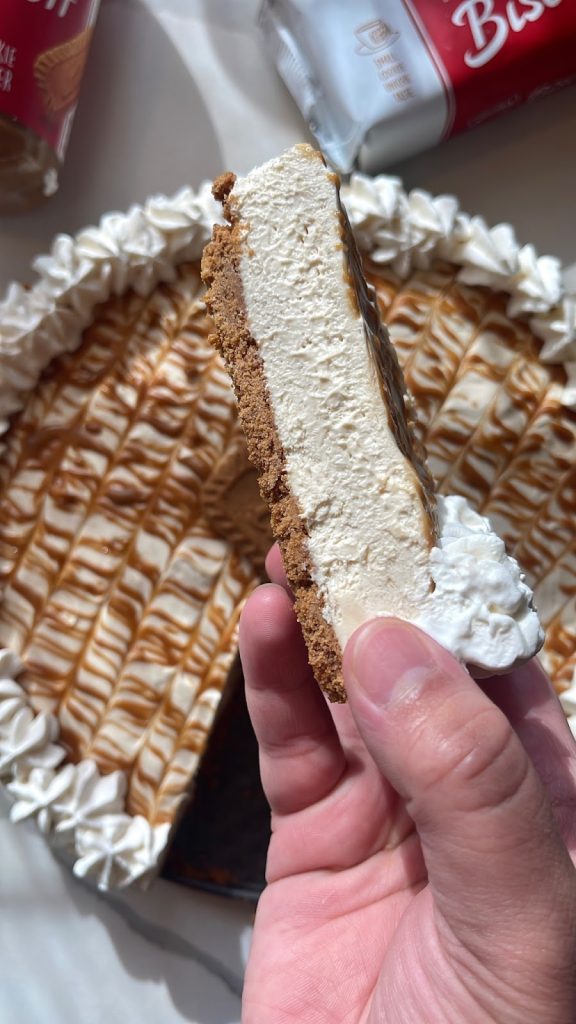
When you’re ready to serve, remove the springform pan’s edge, slice, and enjoy the creamy delight of this cookie butter-infused creation.
The No-Bake Biscoff Cheesecake is more than a dessert; it’s a tribute to the irresistible charm of Biscoff cookies. Creamy, velvety, and spiced to perfection, this cheesecake is a showstopper for any occasion. So, get ready to indulge in the cookie butter delight that’s so easy to create, yet so rich in flavor. Slice, savor, and share the joy of No-Bake Biscoff Cheesecake!
Crush the biscoff biscuits using a food processor or a ziploc bag, set aside 1-2 uncrushed biscuits for decoration
Dump the crushed biscuits into a 9 in springform pan with the melted butter
Firmly press the biscuits into the pan using the bottom of a cup
Place in the freezer and begin working on the cheesecake mixture
In a bowl, whip the cream cheese and cookie butter until smooth
In a separate bowl whip the heavy cream, powdered sugar and vanilla extract until stiff peaks form
Set aside about ½ cup of whipped cream for topping decoration, then carefully fold in the whipped cream into the cream cheese little by little, until fully combined
Dump the cheesecake mixture onto the biscuit crust and smooth out gently
Add melted biscoff butter on top for decoration, place in a ziplock bag and snip off the corner, and drizzle on top of the cheesecake creating straight lines across one side.
Use a toothpick and create streaks the opposite way of the cookie butter drizzle, going up and down with each stroke.
Pipe the leftover whipped cream using a star tip on the edge of the cheesecake to create a border, then place a whole biscuit in the middle
Refrigerate for about 5 hours, or overnight.
Remove springform pan edge, slice and enjoy!
Notes
You can get creative with this no bake cheesecake and decorate it how you want. You can make zigzags using the cookie butter, or make a flower design. You can even create a double crust by crushing some extra biscoff biscuits and press them all over the top so you have a crust on both sides!
I recommend you make this cheesecake the day before you need it, so you can chill it overnight for maximum results. If you don’t have until the next day, then you can place it in the freezer for 2-3 hours.
Stay in the Know!
Sign up with your email address to receive updates on new recipes!